
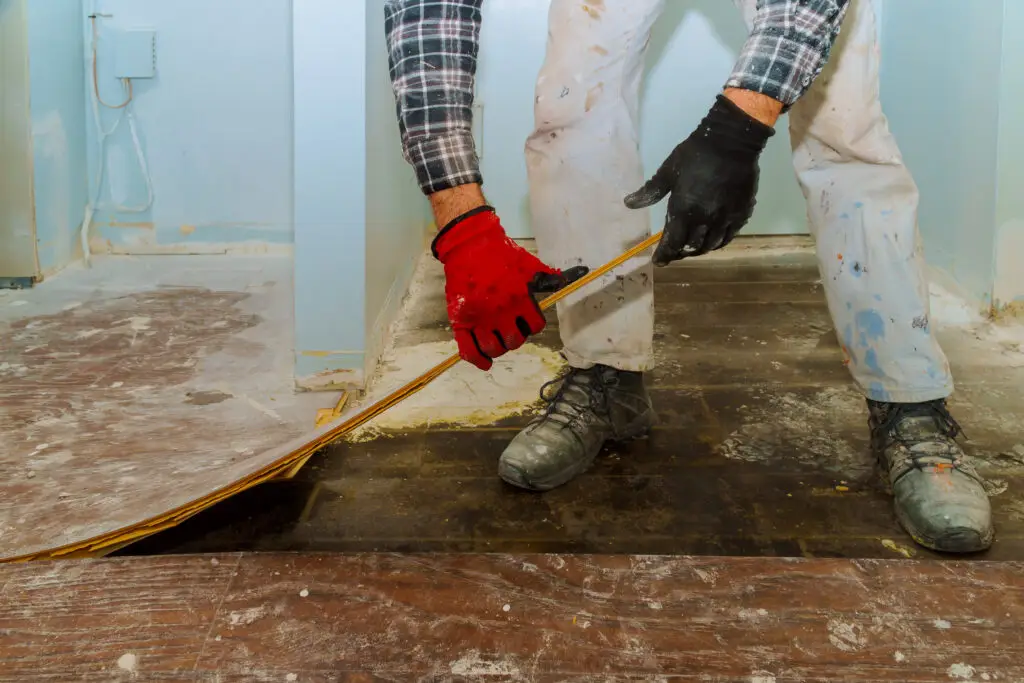
Removing old vinyl flooring is a common first step in many home renovation projects. While often less daunting than tile demolition, it still requires the right tools, techniques, and crucial safety precautions to protect both you and your subfloor. Understanding how to remove vinyl flooring properly ensures a clean slate for your new installation and saves you headaches down the line. For homeowners in Northeast Florida and Georgia, who frequently update their homes, mastering this skill or knowing when to call a professional is invaluable.
When to replace vinyl flooring
Even the most durable vinyl eventually reaches the end of its lifespan or simply no longer fits your home’s aesthetic. Here are common signs it’s time to replace your vinyl flooring:
- Excessive Wear and Tear: Deep scratches, widespread scuffs, dulling finish, or visible wear patterns indicate the protective layer is compromised.
- Curling Edges or Loose Seams: If the edges of planks or sheets are lifting, or seams are gapping, it creates tripping hazards and allows moisture and dirt to seep underneath, potentially leading to subfloor damage.
- Bubbling or Delamination: Trapped moisture or adhesive failure can cause bubbles or delamination, where layers of the vinyl separate. This signals a structural problem and a potential moisture issue.
- Stains and Discoloration: Permanent stains, fading from sunlight, or yellowing can make the floor look unsightly and cannot be remedied.
- Punctures, Rips, or Tears: Significant physical damage compromises the floor’s integrity and aesthetic.
- Mold or Mildew Growth: If you detect musty odors or see visible mold, especially in bathrooms or basements common in humid climates, it’s critical to remove the flooring and address the moisture source immediately.
- Outdated Style: Sometimes, the flooring is perfectly functional but simply doesn’t match your updated décor or personal taste.
Types of vinyl and removal methods
The method of removal largely depends on how the vinyl was originally installed.
- Loose Lay or Floating Vinyl Plank/Tile (LVP/LVT):
- Description: These planks or tiles are designed to click together and “float” over the subfloor, not adhered to it.
- Removal Method: Generally the easiest to remove. Simply pry up the edges of planks or tiles, unlock them, and lift them out.
- Glue-Down Vinyl Plank/Tile (LVP/LVT):
- Description: Individual planks or tiles are fully adhered to the subfloor with adhesive.
- Removal Method: More challenging. Requires scraping, potentially using heat (like a heat gun or hairdryer) to soften the adhesive, or chemical adhesive removers.
- Sheet Vinyl (Glued or Perimeter Glued):
- Description: Vinyl comes in large rolls and is installed in seamless sheets, either fully glued down or adhered just at the perimeter.
- Removal Method: Can be difficult, especially if fully glued. Often requires cutting into strips, then scraping. Heat or chemical removers might be necessary for stubborn adhesive. Older sheet vinyl (pre-1980s) may contain asbestos, requiring professional abatement.
Tools you’ll need for the job
Having the right tools will make the vinyl removal process safer and more efficient.
- Safety Gear (Non-Negotiable):
- Heavy-Duty Gloves: Protect hands from sharp edges and chemicals.
- Safety Glasses/Goggles: Essential for eye protection from flying debris.
- N95 Dust Mask/Respirator: Crucial, especially if sanding adhesive or dealing with older flooring that might contain asbestos (see warning below).
- Knee Pads: You’ll be spending a lot of time on your knees.
- Long Sleeves and Pants: To protect skin.
- Hand Tools:
- Utility Knife: For cutting vinyl into manageable strips or scoring. Keep blades sharp.
- Floor Scraper (Long-Handled): Essential for getting under glued vinyl and scraping off adhesive. Look for a heavy-duty model with a sharp, replaceable blade.
- Pry Bar/Crowbar: For removing baseboards, tack strips (if applicable), or stubborn edges.
- Hammer: For light prying or tapping scraper.
- Putty Knife/Scraper: For smaller adhesive residue.
- Wire Brush/Stiff Bristle Brush: For final cleanup of adhesive residue.
- Power Tools (Optional, but highly recommended for glued-down vinyl):
- Heat Gun or Hairdryer: To soften stubborn adhesive (use caution to avoid overheating or melting vinyl).
- Power Floor Scraper/Stripper: For very large areas of glued-down vinyl (often rentable).
- Angle Grinder with Diamond Cup Wheel (for concrete subfloor): For grinding down heavy adhesive residue on concrete. (Must be used with a HEPA vacuum shroud for dust control!)
- Orbital Sander with Coarse Grit Paper (for wood subfloor): For removing adhesive residue on wood subfloors.
- Shop Vacuum (Wet/Dry): Indispensable for dust and debris cleanup. Ideally, one with a HEPA filter.
- Other Materials:
- Heavy-Duty Contractor Bags: For debris disposal.
- Plastic Sheeting/Drop Cloths: To protect adjacent areas and contain dust.
- Duct Tape/Painter’s Tape: For sealing off doorways, vents.
- Adhesive Remover (Chemical): Use only as a last resort, as they can be messy and require careful handling and ventilation.
Step-by-step removal process
Always prioritize safety and follow proper ventilation procedures.
- Prepare the Room:
- Clear Everything: Remove all furniture, appliances, and fixtures.
- Remove Baseboards/Trim: Carefully pry off baseboards and any shoe molding. Label them if you plan to reuse.
- Contain Dust: Seal off doorways, open vents, and entryways to other rooms with plastic sheeting and painter’s tape to prevent dust from spreading throughout your home. Turn off HVAC if necessary.
- Ventilate: Open windows and use fans to create cross-ventilation, directing air outwards.
- Locate a Starting Point:
- Floating LVP/LVT: Find an edge near a wall or a corner where you can easily pry up the first plank/tile. Once one piece is lifted, the rest will usually unlock.
- Glued Vinyl (Plank/Sheet): Look for a loose edge, seam, or corner. If none exist, use a utility knife to carefully cut a small section (e.g., a few inches in from a wall) to create a starting flap.
- Cut Vinyl into Manageable Sections:
- For glued sheet vinyl, use your utility knife to score the vinyl into 1-2 foot wide strips. This makes it easier to peel and manage.
- For glued LVP/LVT, you can often remove individual planks.
- Pry Up and Scrape:
- Floating LVP/LVT: Simply lift and unlock planks.
- Glued Vinyl:
- Insert your floor scraper or pry bar under the vinyl edge.
- Apply steady pressure to pry the vinyl up. You may need to use a hammer to tap the scraper under stubborn sections.
- For stubborn adhesive: Use a heat gun or hairdryer to warm up a small section of vinyl from above. As the adhesive softens, immediately scrape the vinyl up. Be careful not to melt the vinyl or create excessive fumes.
- Continue working your way across the floor, section by section.
- Remove Adhesive Residue:
- Once the vinyl is gone, you’ll be left with adhesive residue on the subfloor. For wood subfloors, use a floor scraper, putty knife, or orbital sander with coarse-grit paper. For concrete, a floor scraper, or for very tough residue, an angle grinder with a diamond cup wheel (and dust shroud + HEPA vacuum) is effective.
- Chemical adhesive removers are an option, but use them sparingly, as directed, and ensure excellent ventilation. They can be messy and leave residue that needs to be cleaned thoroughly.
- Rough Cleanup: Scoop up large pieces of vinyl and debris into heavy-duty contractor bags.
How to clean and prep subfloor after removal
A clean and properly prepared subfloor is crucial for the success and longevity of your new flooring.
- Thorough Cleaning:
- Vacuum the entire subfloor repeatedly with a powerful shop vacuum (ideally with a HEPA filter) to remove all dust, debris, and fine particles of old adhesive.
- Inspect for Damage/Imperfections:
- Walk the subfloor, looking for any remaining adhesive clumps, nails, staples, cracks (in concrete), or soft spots/rot (in wood).
- Concrete Subfloor: Patch cracks and fill depressions with a concrete patching compound or self-leveling underlayment. Grind down any high spots.
- Wood Subfloor: Replace any sections of rotten or severely damaged plywood/OSB. Secure any loose subfloor sheets with screws to eliminate squeaks. Sand down high spots.
- Leveling:
- Use a long straightedge (6-8 feet) to check for flatness. Most flooring manufacturers require the subfloor to be flat within 1/8 inch over 6 feet.
- Leveling imperfections is crucial, as they can “telegraph” through your new flooring or compromise its locking system.
- Moisture Testing (CRITICAL for FL/GA):
- Especially over concrete slabs common in Northeast Florida and Georgia, conduct a moisture vapor emission test (e.g., calcium chloride or in-situ relative humidity test). High moisture levels must be addressed with a proper moisture barrier or mitigation system before installing new flooring. Ignoring this can lead to mold, odors, and flooring failure.
- Final Vacuum: Before installing any underlayment or new flooring, give the subfloor one last, thorough vacuum.
Disposal tips and environmental considerations
Proper disposal is important for safety and environmental responsibility.
- Heavy-Duty Bags: Vinyl flooring can be heavy and bulky. Use heavy-duty contractor bags to contain debris.
- Check Local Regulations: Disposal of construction and demolition debris varies by municipality. Check with your local waste management services or county landfill for specific drop-off procedures and any associated fees. You may need to haul it to a designated construction and demolition (C&D) waste facility.
- Dumpster Rental: For larger projects, renting a dumpster is often the most convenient and cost-effective solution for disposing of vinyl flooring and other renovation debris.
- Asbestos Warning (Crucial for Older Homes):
- Vinyl flooring, especially sheet vinyl, installed before the mid-1980s (and sometimes into the early 1990s) may contain asbestos in the vinyl material itself or in the black mastic adhesive.
- Do NOT disturb or attempt to remove suspected asbestos-containing materials (ACM) yourself. Asbestos fibers are highly hazardous when airborne and can cause severe lung disease.
- If your home was built before 1980 and you suspect asbestos, stop work immediately and consult a qualified asbestos testing and abatement professional. It’s better to be safe than sorry.
- Recycling: Some vinyl flooring products are recyclable, but facilities are rare for post-consumer waste. Check with local recycling centers or the flooring manufacturer to see if a take-back program exists in your area.
Removing old vinyl flooring is a significant step in a home remodel. By using the right tools, following safety guidelines, and preparing the subfloor correctly, you’ll ensure your new flooring has the perfect foundation for lasting beauty and performance.
Ready to upgrade your home but dread the demolition? Santos Brothers Flooring provides expert flooring removal and professional installation services throughout Northeast Florida and Georgia. Contact us today for a consultation and let us handle the hard work for a seamless transformation!