
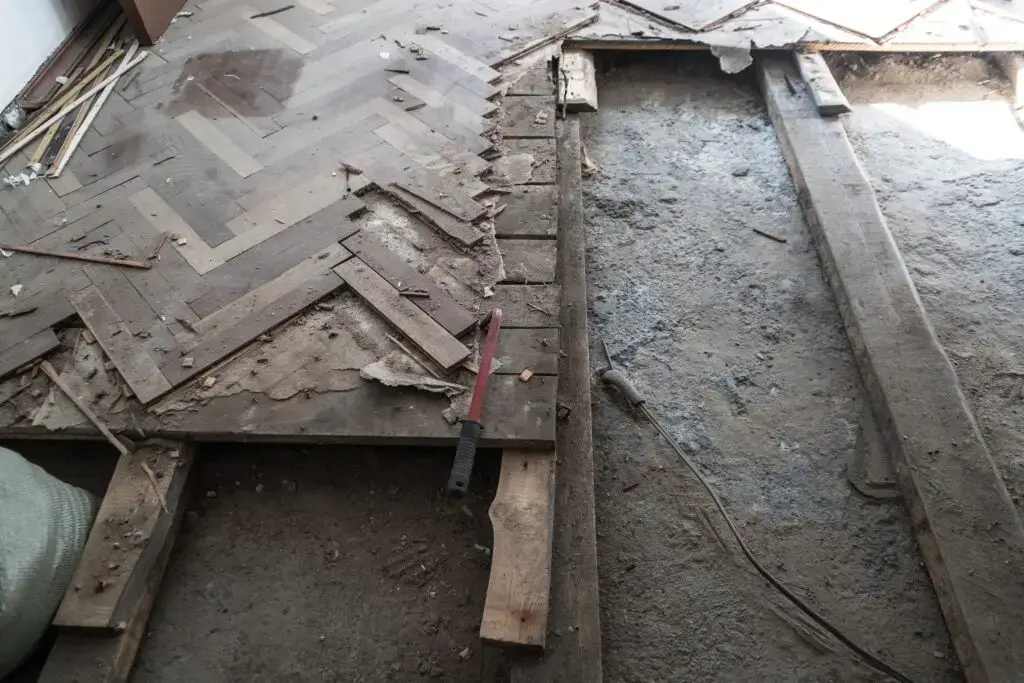
Flooring demolition is the essential, often messy, first step in any major renovation. While it may seem straightforward, a professional approach to demolition is critical to ensure safety, minimize damage to the subfloor, and expedite the installation of the new finish. This guide, brought to you by the experts at Santos Brothers Flooring, outlines the professional steps for removing common floor coverings.
Safety First
Demolition is physically demanding and creates a hazardous environment. Proper preparation minimizes risk of injury and exposure to harmful materials.
PPE (Gloves, Goggles, Respirator, Knee Pads)
Personal Protective Equipment (PPE) is non-negotiable for flooring demolition.
- Heavy-Duty Gloves: Protect against splintered wood, sharp tile edges, and nails.
- Safety Goggles or Full Face Shield: Essential for protecting eyes from flying debris, especially when chipping concrete or cutting wood.
- Respirator (N95 or better): Absolutely mandatory. Flooring demolition generates massive amounts of fine dust from concrete, wood, old adhesives, and potentially hazardous materials. A proper respirator prevents lung irritation and long-term health issues.
- Knee Pads: Protect joints during low-level scraping and prying, a requirement for any pro working on floors.
- Hearing Protection: Use earplugs or earmuffs when operating loud equipment like demo hammers or grinders.
Asbestos/Lead Paint Considerations in Older Homes
If you are removing flooring installed before 1980, especially sheet vinyl, vinyl composition tile (VCT), or adhesive/mastic, you must operate under the assumption that asbestos-containing materials (ACM) or lead paint (found on baseboards) are present.
- Testing is Mandatory: Before disturbing the material, professional testing is required. If ACM or lead is confirmed, the removal process must be handled by licensed abatement specialists, not standard demolition crews, to comply with environmental regulations and protect occupants.
- Containment: If testing is pending or removal is underway, isolate the area using plastic sheeting, seal HVAC vents, and maintain negative air pressure to prevent contamination of the rest of the structure.
Tools You’ll Need
The right tools turn an arduous job into an efficient process, allowing for fast, clean removal.
Pry Bar, Floor Scraper, Oscillating Multi-Tool
- Pry Bar/Flat Bar: Used primarily for lifting nailed or stapled wood planks and removing baseboards. Choose a bar with a wide, flat end to minimize damage to drywall.
- Floor Scraper (Manual/Long-Handled): Essential for removing adhered materials like sheet vinyl, carpet backing, and stubborn thinset residue.
- Oscillating Multi-Tool: Equipped with a metal cutting blade, this tool is perfect for cutting nails, staples, or metal flashing and for undercutting door jambs before new flooring installation.
Demo Hammer, Shop Vac, Debris Bags
- Demo Hammer (Electric Chipping Hammer): A necessity for concrete demolition or removing ceramic tile and thick mortar beds. Use a wide, chisel bit attachment for maximum efficiency in chipping away material and adhesive.
- Shop Vac (HEPA-Filtered): Standard shop vacuums simply recirculate fine dust. A HEPA-filtered shop vacuum is mandatory for collecting construction dust safely and complying with lead-safe work practices.
- Heavy-Duty Debris Bags/Containers: Demolition waste is heavy and sharp. Use reinforced contractor-grade trash bags or durable trash cans to contain waste safely and prevent bags from tearing when moved.
How to Demolish Different Floor Types
Each floor material requires a unique approach to ensure efficient removal and minimal subfloor damage.
Tile Over Thinset or Mortar Bed
- Preparation: Locate a starting point (often near a heating vent or door) or use a hammer and chisel to break the first tile in the center of the room.
- Removal: Use the demolition hammer fitted with a chisel bit to break the tile and chip the underlying thinset. Work in manageable sections.
- Thinset Grinding: Once the tile is removed, the residual thinset or mortar must be taken down to the subfloor level. For thick mortar beds, continue using the chipping hammer. For thinset residue, a floor scraper or a specialized floor grinder (with a diamond cup wheel and vacuum shroud) is used to achieve a smooth, clean surface suitable for the next installation.
Hardwood (Nailed, Stapled, or Glued)
- Nailed/Stapled: Start near a wall and use a pry bar to wedge the first row of boards up. Once you have an opening, use the pry bar to detach boards row by row. Boards usually come up in lengths, which simplifies disposal. Remove all remaining nails and staples with pliers or the flat end of a hammer.
- Glued (Mastic/Urethane): This is the most difficult type. The boards often break apart, leaving adhesive stubbornly bonded to the subfloor. A walk-behind floor scraper (for large jobs) or a handheld power floor stripper is often required to shave the adhesive and wood residue down to the bare subfloor.
Laminate and Floating Vinyl Planks
- Disassembly: These systems are designed to lock together and “float” over the subfloor, making them the easiest to remove.
- Removal: Start at the last row installed (usually against a wall) and lift the boards up, unlocking them from the neighboring planks. Continue working backward, simply stacking the planks for disposal. No adhesive or fasteners are typically involved.
Sheet Vinyl and Carpet with Tack Strips
- Carpet: Use utility knives to cut the carpet into strips ($3\text{-foot}$ width is manageable). Roll up the strips, starting at one end, and tape them tightly. Use the pry bar to carefully remove the sharp metal tack strips (which hold the carpet perimeter) from the subfloor.
- Sheet Vinyl: Cut the sheet vinyl into manageable strips. For perimeter-adhered vinyl, the main sheet often lifts easily after the edges are freed. For fully-adhered vinyl, removal will require a floor scraper to shear the vinyl and adhesive off the subfloor. Chemical adhesive removers may be necessary, requiring excellent ventilation.
Subfloor Inspection & Prep After Demo
A successful new floor installation relies entirely on the quality of the subfloor after demolition. Never skip this vital inspection phase.
Check for Moisture, Squeaks, and Levelness
- Moisture Check: Especially critical for concrete slabs, use a moisture meter to ensure the slab’s humidity level is within the specifications of the new flooring material. High moisture content requires a vapor barrier or mitigation system.
- Squeaks: Walk the subfloor and identify all squeaks (often caused by loose nails or screws). Secure the subfloor by driving in additional construction screws near the joists to eliminate movement.
- Levelness: Use a straight edge (at least $6\text{-foot}$ long) to check for dips, humps, or deviations. Most flooring manufacturers require less than $1/8$ inch variation over a $6\text{-foot}$ span.
Patch, Sand, and Underlayment Options
- Patching and Leveling: Minor dips and inconsistencies in wooden subfloors can be sanded. For concrete or significant wood subfloor dips, use the appropriate patching compound (cementitious for concrete, feather finish for wood) to fill depressions and feather the transition zones.
- Sanding: Sanding removes small adhesive residue, paint splatters, and smooths patched areas.
- Underlayment: Install the necessary underlayment as specified by the manufacturer of the new floor. This could include vapor barriers, foam padding for sound dampening, or specialized cement board for tile installations.
Disposal & Dust Control
Responsible waste management and airborne particulate control are hallmarks of a professional job site.
Sectioning Waste, Dumpster Planning, HEPA Vacs
- Waste Sectioning: Separate waste streams: wood/carpet, ceramic/concrete, and hazardous materials (if applicable). This makes disposal easier and potentially cheaper.
- Dumpster Planning: Estimate the volume of waste (flooring material is surprisingly dense). Obtain the appropriate dumpster size (e.g., a $10\text{-yard}$ dumpster is common for small residential jobs) and secure any necessary street permits from the municipality before the demolition begins.
- Dust Control: Maintain a dust barrier between the work zone and the rest of the house using zipper doors and plastic sheeting. Run a large commercial HEPA air scrubber in the work zone to pull fine particles from the air, in conjunction with using the HEPA-filtered shop vacuum at all times.
FAQs
How long does demolition take per room?
Demolition time varies widely based on the material, adhesive, and room size.
- Floating Floors (Laminate/Vinyl): Very fast; often less than 1 hour for a small ($10 \text{ft} \times 12 \text{ft}$) room.
- Carpet: Fast; approximately 1-2 hours per room.
- Nailed Hardwood: Moderate; approximately 2-4 hours per room.
- Glued Hardwood or Ceramic Tile Over Mortar Bed: Slowest and most labor-intensive; can take 4-8 hours per room just for demolition, followed by significant time for adhesive/thinset grinding.
Can I DIY or should I hire a pro?
While a floating floor removal is a manageable DIY task, we highly recommend hiring a professional for complex jobs due to the following factors:
- Health Risks: Exposure to asbestos, lead, and high levels of silica dust from concrete/thinset. Professionals use certified PPE and HEPA containment.
- Subfloor Damage: Improper technique (especially with thinset or glued hardwood) can severely damage the subfloor, adding major repair costs and delaying the new installation.
- Speed and Efficiency: Professional crews use specialized, powerful tools (like walk-behind scrapers and chipping hammers) that significantly reduce labor time compared to manual DIY removal.
Don’t risk the hassle, the health hazards, or the potential subfloor damage of DIY demolition.
Trust the preparation phase to the experts who understand proper technique and subfloor integrity. Contact Santos Brothers Flooring today for a comprehensive quote that includes safe, clean, and efficient flooring demolition, ensuring your foundation is perfectly prepared for your beautiful new installation.