
Transforming a cold, damp basement into a warm, inviting living space is a fantastic way to add functional square footage to your home. When it comes to basement flooring, vinyl flooring (especially Luxury Vinyl Plank or LVP) is a top choice due to its resilience against moisture, durability, and wide array of stylish options. Installing vinyl flooring on a concrete basement floor requires specific preparation, but with the right techniques, you can achieve a beautiful, long-lasting finish. For homeowners in humid regions like Northeast Florida and Georgia, understanding how to properly manage moisture is paramount for a successful installation.
Why vinyl is ideal for basement floors
Vinyl flooring, particularly modern Luxury Vinyl Plank (LVP) and Luxury Vinyl Tile (LVT) with rigid cores (SPC or WPC), is exceptionally well-suited for concrete basement environments for several key reasons:
- 100% Waterproof: This is its greatest advantage. Unlike wood-based flooring, quality vinyl planks are impervious to water. This means spills, tracked-in moisture, and even minor leaks won’t cause the planks to swell, warp, or delaminate. This is a critical factor for basements, especially in humid climates.
- High Durability: LVP/LVT features a tough wear layer that resists scratches, dents, and scuffs from heavy foot traffic, furniture, and pets. It holds up exceptionally well to the demands of a busy household.
- Moisture-Resistant Core: Most modern LVP/LVT products have a Stone Plastic Composite (SPC) or Wood Plastic Composite (WPC) core, which are highly stable and won’t be affected by the consistent humidity levels often found in basements.
- Comfort Underfoot: Compared to tile or bare concrete, vinyl offers a softer and warmer feel underfoot, making basement spaces more comfortable for living.
- Versatile Design: LVP/LVT comes in an astonishing array of realistic wood grain, stone, and abstract patterns, allowing you to achieve virtually any aesthetic from modern to traditional.
- Ease of Installation: Many vinyl products utilize a click-lock floating system, which can be a manageable DIY project, potentially saving on labor costs.
Prepping the concrete subfloor
Proper subfloor preparation is the most critical step for a successful and long-lasting vinyl floor installation in a basement.
- Clear the Area: Remove all furniture, appliances, and any existing flooring, including adhesives and residues.
- Clean the Slab: Thoroughly sweep and vacuum the concrete slab to remove all dirt, dust, and debris. For stubborn stains or residues (paint, old adhesive), use a concrete grinder or appropriate cleaning solutions. The slab must be immaculately clean for proper adhesion or underlayment performance.
- Inspect for Damage and Levelness:
- Cracks and Holes: Fill any cracks or holes in the concrete using a suitable concrete patching compound.
- Levelness: Use a long, straightedge (6-8 feet) to check the flatness of the slab. Most vinyl flooring manufacturers require the subfloor to be flat within 1/8 inch over a 6-foot span.
- High Spots: Grind down any high spots.
- Low Spots: Fill any low spots or depressions with a self-leveling underlayment (SLU). Mix and pour SLU according to manufacturer instructions, ensuring it flows evenly to create a perfectly flat surface. Allow it to cure completely, which can take 24-72 hours.
Moisture testing and vapor barrier requirements
Moisture is the primary enemy of any flooring in a basement. Ignoring moisture can lead to mold, mildew, and flooring failure. This step is non-negotiable, especially in humid regions like Northeast Florida and Georgia.
- Moisture Testing: Before installing anything, you must test your concrete slab for moisture vapor emissions.
- Calcium Chloride Test (ASTM F1869): This is a common and affordable test that measures the amount of moisture vapor released over 24 hours.
- In-Situ Relative Humidity (RH) Test (ASTM F2170): Considered more accurate, this involves drilling small holes into the slab and inserting probes to measure the internal relative humidity.
- Acceptable Levels: Consult your vinyl flooring manufacturer’s specifications for acceptable moisture levels. They typically range from 3.5 to 4.5 lbs per 1,000 sq ft per 24 hours for calcium chloride, or 75-85% RH for in-situ tests. If levels are too high, you must address the issue (e.g., foundation sealing, dehumidifiers) or use a more robust moisture mitigation system.
- Vapor Barrier: Even if your concrete slab passes the moisture test, a vapor barrier is almost always required (or highly recommended) when installing vinyl flooring in a basement.
- 6-mil Polyethylene Sheeting: This is the most common type. Lay it over the entire concrete slab, overlapping seams by at least 6-8 inches and sealing them with waterproof tape. Extend the sheeting 2-3 inches up the walls to be covered by baseboards later.
- Liquid-Applied Moisture Barriers: Some manufacturers offer liquid-applied membranes that are rolled or troweled onto the concrete slab, creating a seamless vapor barrier.
- Integrated Underlayment: Some LVP/LVT products come with an attached underlayment that acts as a moisture barrier. However, for basements, an additional 6-mil poly sheeting is often still recommended or required by warranty, especially over concrete.
Step-by-step installation process
Once your concrete subfloor is clean, level, and protected by a vapor barrier, you can begin the vinyl installation. The process varies slightly depending on the installation method:
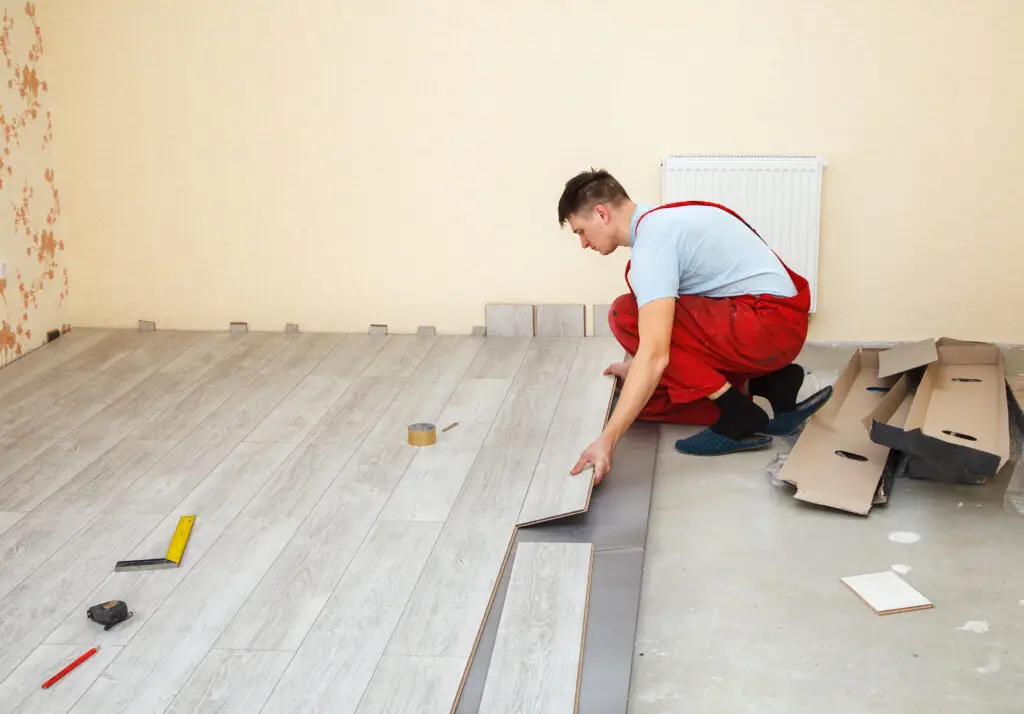
Floating (Click-Lock) Vinyl Plank/Tile
This is the most popular method for basement LVP/LVT.
- Acclimate Vinyl: Unbox the vinyl planks and allow them to acclimate in the basement for at least 48-72 hours prior to installation. This helps the material adjust to the room’s temperature and humidity.
- Plan Layout: Determine your starting wall (usually the longest, straightest wall). Plan your layout to avoid very thin slivers of planks at the edges and ensure staggered end joints for stability and aesthetics.
- Lay First Row: Place the first plank, tongue side facing the wall, leaving the manufacturer-recommended expansion gap (typically 1/4 to 1/2 inch) around the entire perimeter of the room. Use spacers to maintain this gap.
- Connect Subsequent Rows: Angle and “click” the tongue of the new plank into the groove of the previous row. Use a rubber mallet and tapping block to gently tap planks together for a tight, secure fit. Ensure all seams are tightly closed.
- Cut Around Obstacles: Use a utility knife and straightedge for straight cuts, or a jigsaw/rotary tool for irregular cuts around pipes, doorways, or support columns.
- Complete Installation: Continue laying rows, maintaining your expansion gaps, until the room is covered.
- Remove Spacers & Install Trim: Once finished, remove all spacers. Install baseboards or shoe molding to cover the expansion gaps.
Glue-Down Vinyl Plank/Tile
This method provides maximum stability and is often used in commercial or high-traffic residential basements.
- Acclimate Vinyl: Same as floating.
- Plan Layout: Same as floating.
- Apply Adhesive: Use a trowel to spread the manufacturer-recommended adhesive onto the concrete subfloor in sections, following the adhesive’s specific open time (how long it remains tacky).
- Place Planks: Carefully set each plank into the wet adhesive, pressing down firmly to ensure full contact.
- Roll the Floor: Use a heavy floor roller (often rentable) over the newly laid vinyl to ensure excellent adhesion and remove any air bubbles.
- Cure Time: Allow the adhesive to cure for the manufacturer’s recommended time (24-72 hours) before walking on the floor or replacing furniture.
Peel-and-Stick Vinyl Tile/Plank
A more DIY-friendly option, but generally less durable and less recommended for basements than LVP.
- Acclimate Vinyl: Same as floating.
- Plan Layout: Same as floating.
- Apply Primer (Recommended): Apply a primer to the concrete subfloor as recommended by the vinyl manufacturer to enhance adhesion.
- Peel and Place: Peel off the backing paper from each tile/plank and carefully align it, pressing firmly onto the subfloor.
- Roll the Floor: Use a hand roller or light floor roller to ensure good adhesion, particularly at edges and corners.
Maintenance tips for long-term performance
Once your vinyl basement floor is installed, a few simple maintenance practices will keep it looking great for years:
- Regular Cleaning: Sweep or vacuum (with a soft brush attachment) frequently to remove dirt and grit, which can act as an abrasive.
- Damp Mopping: Mop with a damp mop and a pH-neutral cleaner specifically designed for vinyl flooring. Avoid excessive water, harsh chemicals, abrasive cleaners, or steam mops, as these can damage the wear layer or loosen adhesives.
- Wipe Spills Immediately: While waterproof, it’s always best to wipe up any liquid spills or tracked-in moisture promptly to prevent accidental slips or potential issues with the subfloor.
- Use Furniture Protectors: Place felt pads under the legs of all furniture to prevent scratches and dents.
- Area Rugs: Consider using area rugs in high-traffic zones or under heavy furniture for added protection and comfort.
- Control Humidity: In humid climates like Northeast Florida and Georgia, maintain consistent indoor humidity levels (ideally 35-65%) using a dehumidifier or proper HVAC system. This helps protect both your flooring and your home’s structure.
By following these steps, you can successfully install beautiful, durable, and waterproof vinyl flooring in your basement, transforming it into a valuable and enjoyable part of your home.
Ready to upgrade your basement with the perfect flooring solution in Northeast Florida or Georgia? Santos Brothers Flooring specializes in expert vinyl flooring installation on concrete basement floors, ensuring a long-lasting and beautiful finish. Contact us today for a personalized consultation and a detailed quote!